Showing posts with label direction following. Show all posts

Sunday, August 25, 2013

Howard Wigglebottom, first language lesson of the school year


For this post, I am sharing with you the lesson that I am using for the beginning of the school year. This lesson aligns with common core and meets a variety of language goals.    I am including links to mindwingconcepts.com, Amazon.com, and lessonpix.com for your convenience. 

I work primarily with Preschoolers and kindergarteners, and as of yet, there are no common core standards for preschool.  But I think the standards for Kindergarten give me a good framework for what to work towards.

This lesson will address the following kindergarten standards:
CCSS.ELA-Literacy.SL.K.2 Confirm understanding of a text read aloud or information presented orally or through other media by asking and answering questions about key details and requesting clarification if something is not understood.
CCSS.ELA-Literacy.SL.K.4 Describe familiar people, places, things, and events and, with prompting and support, provide additional detail.

This lesson also addresses IEP goals focusing on direction following, increasing MLU, vocabulary, answering “wh” questions, sentence structure, and story narrative. 

Materials:
Braidy The Storybraid (or The Story Grammar Marker) from mindwingconcepts.com.


Howard Wigglebottom Learns to Listen by Howard Binkow and illustrated by Susan Cornelison.


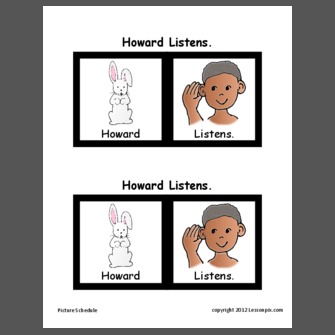
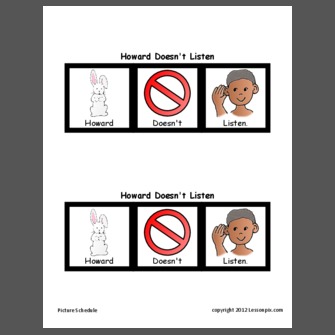
Sentence Strips: “Howard doesn’t listen.” “Howard learns to listen.” I made my sentence strips from lessonpix.com. 


Howard Wiggle Bottom is an adorable story that tells about a little rabbit named Howard and his adventures in school. He struggles with listening to his teacher and to his friends, which create problems for all involved.  Eventually he is asked to take a time out.  Howard decides to listen and is positively reinforced for his good listening behavior.  This is a good book for the beginning of the school year, because it helps children recognize appropriate and inappropriate behavior in the classroom session.

This book also lends itself well to story retell as it is a complete episode.  However, the book’s audience is younger children who are just beginning their school year.  In addition, some of the children I work with have not been exposed to the StoryBraidy and are not developmentally ready for the later stages of story retell. Time will need to be spent at the beginning stages.

Step 1:
Review or introduce the concept of Character.  
The manual for the Storybraid comes with excellent lessons on how to teach the concept of character.  While I do adjust the lessons to meet the needs of my students and teachers, I do follow the order and structure.

For my non-verbal/newly verbal students, I will address basic concepts of pointing to body parts (i.e. eyes, face and head.) I do hand over hand with them if necessary, but I work towards having them point or touch eyes and head on both the Braidy Doll and on themselves independently.    I also work on naming body parts.

Students using short phrases and following 1 step directions will begin identifying characters.  I begin asking questions such as “Are you a character?”  “Am I a character?”  “Is your friend a character?”  “Is your pet a character?”  We are beginning to answer “who” questions.  We begin discussion the physical traits of a character (has eyes, face, and head) and the fact that a character can “do” things. 

For students that already have exposure to Braidy, we will also talk about setting in terms of place.  We begin to answer “Where” Questions.  “Where are you?” “Is a school a setting?”

Step 2: 
Read and then talk about the book. 
           
For my non-verbal and newly verbal students I have them begin to point to images in the book.  They point to Howard, to his friends, to the teacher and to his friends.  We begin working on naming items in the book.

For my students using short phrases, we will begin answering “who” questions and answering in complete short sentence. 
            “Who is the Character?”
            “Howard is a character.”

            For my older students, we will also begin to answer “Where” questions?
                        “Where is Howard?”
                        “Howard is at school.”
                        “Howard is in the classroom.”
                        “Howard is in the cafeteria.”
                        “Howard is on the playground.”

Step 3: 
Review the book and use sentence strips.

For my non-verbal and newly verbal students I will have them point to the picture as I say the words.  I use hand over hand if necessary to help them understand what I want.

My students short MLU’s will work on using contractions and verb conjugation.  I work on having them  point independently while saying the words of the sentence, but I also model it if necessary.

For my older students we look at the words under the picture to address print recognition.

For me, the majority of my language therapy is done in the classroom.  In each classroom, I am likely to have students at every level and need to be able to meet all of their needs at once.  I typically see my students for two 30 minutes sessions and I recruit the classroom staff to help me with the lessons.  I will probably repeat this lesson 4 to 6 times, reducing my support and increasing student independence.     

Thursday, August 15, 2013

Welcome Routine and Student Folders

So Tuesday was the first day of school for my school district, and it was fun to wandering into classrooms and seeing all my old students.  I won't start official therapy until next week; the first week of school is usually about finding where all my kids are and getting my caseload together.  I will have 4 special education preschool classes, several preschool speech therapy only kids, and I will probably have a few k-5 as well.

I am also setting up my materials for my speech room routine. I like routines.  It makes my life easier.  It also makes my students' life easier, because they know what to expect and what they are supposed to do, which makes them more independent.

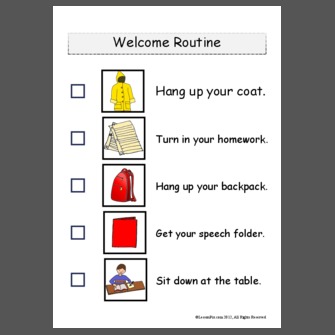
This is my welcome routine, which I made using lessonpix.com:


I use this with all of my students who come to my room.  I review it several times after introducing it my students can either do this independently. Occasionally I have to refer them to the list to get them back on track.

This week I got every thing ready to put student folders together for the new year.

Shipping labels, pocket folders, and a reward chart are the main items.  You can download my reward chart for free teacherspayteachers.com here.

On the first session, my students will pick a color for their folder.  I will then put a shipping label on the folder and either myself or the student will write their name on the label. Afterwards, they get to decorate their folder with stickers.

Inside the folder I keep their data sheets and reward chart.


I keep the folders in a file box I bought from Big Lots many years ago.


I made the dividers with poster board and shipping labels.
Most 4 year old's can recognize the first letter in their name.  After some practice they are able to look for their letter, and then recognize their own folder.  Some of my 3 year olds can also do this, but if they can't, I am able to help them pretty easily without getting out of routine myself. 

It's taken me a few years and adjustments to make this system work for me, and this is the first year I haven't felt the need to tweak it a bit.  It's helped reduce behavior issues, and has helped keep me organized.  Hopefully it will give you some ideas.

Do you have a welcome routine?  What is it?  Leave a comment below.


Tuesday, July 9, 2013

I ain't gonna paint no more....

So I was going to post this last December.  But immediately after the Sandy Hook tragedy, I faced  a personal tragedy myself.  I didn't know it at the time, but two days before the shooting a friend of mine had killed himself.
My Christmas Holiday was spent dealing with the grief of losing a dear friend.  And the spring semester got so busy that I didn't get back to blogging.  But since I'm back, and I thought I would finish this post.  Following is a post I had meant for before the Christmas Holiday:

I change out my books every few weeks or so. I held on to my last unit for longer than I wanted, but between parent teacher conferences, and the Thanksgiving Holiday it just didn't seem like a good time to switch. But things should calm down until our winter Holiday. So for the next 3 or so weeks, I will use a different book.

I Ain't Gonna Paint No More is an adorable little story about a little boy, who has been banned from painting anymore. But that doesn't stop him, and he begins to paint his entire body.


My target vocabulary book is as follows:  Head, neck, arm, hand, chest, back, legs, feet, and paint. Many of my kids will already know most if not all of there body parts (although I have few who don't.) We will talk about what with our body parts, and I will be looking for them to be able to tell me from session to session what they can do with their body parts.

Next we will do our song.  Instead of body parts, we will work on colors, to keep the theme of painting.  I found this song just doing a google search for preschool songs about colors:

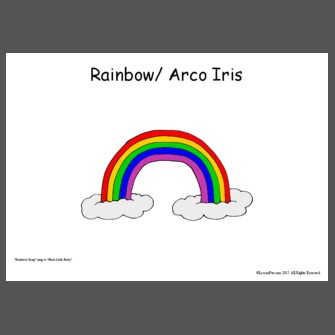
Rainbow Song 
Sung to the Tune of "Hush Little Baby"
Author Unknown
Rainbow purple
Rainbow blue
Rainbow green
And yellow too
Rainbow orange
Rainbow red
Rainbow shining over head.

For finger play I will use the ASL signs for rainbow and for the colors. Because I have many kids who's first language is Spanish I will also sing a loosely translated version in Spanish.

If you have a subscription to lessonpix.com  you can access my cue cards for the Rainbow Song.
I was unable to make public my pictures for the body parts, because I uploaded an internet picture for chest.  But they are easy to make yourself on lessonpix. 


Sunday, November 25, 2012

My kit

A few years ago, My school district sponsored Dr. Judy Montgomery to come and talk to all the SLP's that worked in our district.  One of the things that she really stressed was that we needed to follow a program in our therapy.  It didn't have to be one that you bought, but it needed to be something that was consistent and systematic.  She suggested that if you put all your items for your therapy sessions in a box or kit and you used the items every time, you had created your own program.

I have taken her advice to heart.  I don't use a box.  Instead I use a 3 ring binder with plastic bags, so that I can easily carry my materials from class to class.
It's blurry on purpose.  On the outside of the notebook, I keep my schedule.  It helps me both keep track of where I'm supposed to be when, but I can't tell you how many times people ask me about my schedule, and I honestly can't remember when I see who when.


I also keep my schedule on Microsoft outlook, which is nice for scheduling re occurring  appointments like therapy sessions. But that's also where  I  schedule things like IEP's, SAT meeting, and Parent teacher conferences.  I print out my weekly schedule to give me more detail on my availability at any given time.  In the pockets I keep my data sheets.


I got this idea from Pinterest.  I use ziploc type plastic bags.  I used duct tape at the bottom and punched holes so I could put the bag in the notebook.  They've held up pretty well.


In my notebook, I carry everything I need for my lesson:  A book, sentence strips, paper puppets, pictures for my song.  My lesson follows the same routine routine every single session:
1) book
2)Review of vocabulary /Direction following (using the paper puppets)
3) Song
4) Reread the book
5) practice sentences with targeted vocabulary using  a sentence strip

I adjust in complexity and requirements for each students based on each level.


Sunday, November 18, 2012

Raindrops...

Two more work days until Thanksgiving break, and I'm looking forward to the time off.  The last two days mark the end of my unit on the book Raindrops by Sandy Gay. I bought the book at a library book sale, but you can find the book on Amazon as well.

My typical preschool language lesson runs a little like this:
1. Read a book.
2. Review  vocabulary/practice direction following.
3. Read the book again, but talk about events in the book/expand vocabulary concepts.
4. Sing  a song
5. Sentence strips.

The vocabulary I addressed was: house, window, hat,  flowers, dog, dad, umbrella and rain, as well as prepositions on top and under. To address the vocabulary I used puppets made from lessonpix.com. 


 Using these pictures, I can work on naming and identifying.  But, I also use them for following two-step directions: "Put the dog under the chair.  I use one of the cube chairs already in the classroom and my students get to practice listening for objects and prepositions.

I used the following song: (To the tune of "I'm a little teacup)
Pitter Patter Raindrops falling from the sky. (Wiggling fingers in a downward motion to make rain.)
Here is my umbrella to keep me safe and dry. (Hold the umbrella.)
When the rain is over, the sun begins to glow (Raise arms in a circle above your head to make the sun.)
Little flowers start to bud and grow grow grow.  (Bring hand down making bud raise them up for each grow.)
(Original author unknown)

I like this song because it talks about the function of an umbrella.  Many of our language delayed students may know  a vocabulary word when looking at the picture but lack the skills to describe the object or explain it's use. 


The last thing I do in this lesson is sentence strips.  Again, I used lessonpix.com  to create the pictures for our sentences.


 On one side I have the target sentence. For this book, the target sentence is "Raining on my _________."


On the back side I keep the extra vocabulary so that my students can quickly change out the word.
I find that students who struggle to formulate 3 to 5 word phrases are more successful with the visual and tactile cues of a sentence strip. Since I repeat the lesson over several week, my students have lots of opportunities to practice using longer sentences.  For some of my students, I've made it more challenging by adding a "It is..." to the beginning of the sentence. 
For my non-verbal students, I have them point to the picture as I say the word. Initially, I need to do hand over hand pointing, eventually I find they can point with out needing my help, and one of my "non-verbal students" is now attempting word approximations while pointing. 

In the desert, we don't get much rain, but we've had two rainy days since I started this lesson.  This makes me happy.