Thursday, September 5, 2013

Picture exchange organization

This post contains amazon affiliate links for your convenience.

Wow it's been a week.  Last weekend I was out of town visiting my then 91 year old grandmother.  My birthday was the 1st and hers was the 3rd, so Labor day weekend seemed like a good time for a visit.  The visit was lovely. Unfortunately, by my birthday I had come down with a chest cold.  Ah, the joys of working with little children. (Although, to be fair, I'm pretty certain it was a coworker that got me sick.) I am getting better day by day, but I've been fairly low on energy.  I did want to share what I've been working on to make my job easier.

If you follow me on instagram.com you might have seen this picture: http://instagram.com/
My new coworker (not the one that made me sick) showed me how she stored her pictures for picture exchange, and I was inspired!
I pulled out a 3 ring notebook and got to work.  The first thing I needed was pocket page protectors.  These were invented to display baseball cards, but they work well for our purposes.

  
One of the tricks of the trade I learned early on is when I make a picture for communication, I always make more than one, because the odds are good I will need that picture again. I already had some pictures.  But I went ahead and restocked as well as created some pictures that I thought I would need, but didn't have already. 

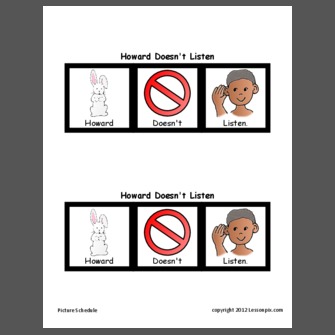
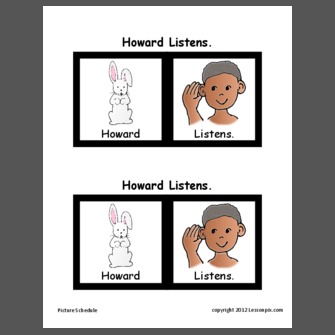
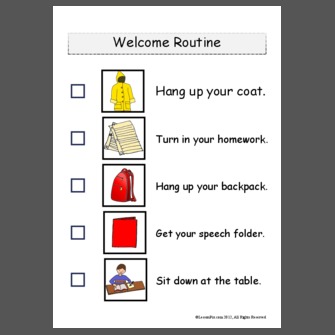
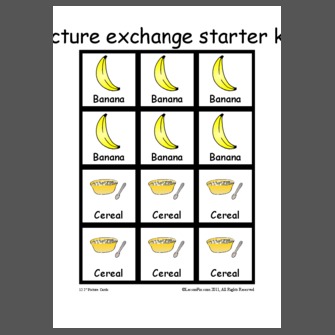
There are lots of ways to get pictures for picture exchange.  The most common is Boardmaker.  They have a ton of pictures and have been around since the dark ages. (Well at least since I was in grad school.)  But if you read my blog you know I'm a convert to lessonpix.com.  It is a monthly subscription, but I can access it anywhere, including my living room couch, and I don't need to worry about the version of Boardmaker working with the type of computer the school has assigned to me.  If you have lessonpix.com feel free to use my picture exchange starter kit to get you started.


After printing them out, I laminated the pictures.  There is a laminating machine in our school, but our campus is huge and the work room is on the opposite side of campus.  Add in the facts I can't always guarantee the machine is working, I live in the desert and don't always desire a hike in the heat, and that I was sick and took a sick day on Tuesday...I decided to use my own personal laminating machine.  I highly recommend getting one.  They are not that expensive, pretty reliable, and can save you a lot of time.

This is the one I own:

Don't forget to order laminating pages:


After you laminate  and cut out your pictures the organization can begin:

My first category is highly motivating toys. 
I have a section for requests for activities,
 and snacks.
In my note book I also keep a pencil pouch to store scissors and velcro:


In the back pocket I store laminated half folders. These are what I use to get started when a kid needs a fast low tech communication system:


I store my notebook in my SLP "go" kit so that I always have it when I need it.  


Having accessible pictures isn't just for picture communication for the non-verbal student. I pull these pictures out for behavior modification, sequencing activities, and following directions. They are fairly sturdy, and if they do fall apart, I always have more. For the SLP working with preschool aged children, having ready access to pictures is a must. 

Sunday, August 25, 2013

Howard Wigglebottom, first language lesson of the school year


For this post, I am sharing with you the lesson that I am using for the beginning of the school year. This lesson aligns with common core and meets a variety of language goals.    I am including links to mindwingconcepts.com, Amazon.com, and lessonpix.com for your convenience. 

I work primarily with Preschoolers and kindergarteners, and as of yet, there are no common core standards for preschool.  But I think the standards for Kindergarten give me a good framework for what to work towards.

This lesson will address the following kindergarten standards:
CCSS.ELA-Literacy.SL.K.2 Confirm understanding of a text read aloud or information presented orally or through other media by asking and answering questions about key details and requesting clarification if something is not understood.
CCSS.ELA-Literacy.SL.K.4 Describe familiar people, places, things, and events and, with prompting and support, provide additional detail.

This lesson also addresses IEP goals focusing on direction following, increasing MLU, vocabulary, answering “wh” questions, sentence structure, and story narrative. 

Materials:
Braidy The Storybraid (or The Story Grammar Marker) from mindwingconcepts.com.


Howard Wigglebottom Learns to Listen by Howard Binkow and illustrated by Susan Cornelison.


Sentence Strips: “Howard doesn’t listen.” “Howard learns to listen.” I made my sentence strips from lessonpix.com


Howard Wiggle Bottom is an adorable story that tells about a little rabbit named Howard and his adventures in school. He struggles with listening to his teacher and to his friends, which create problems for all involved.  Eventually he is asked to take a time out.  Howard decides to listen and is positively reinforced for his good listening behavior.  This is a good book for the beginning of the school year, because it helps children recognize appropriate and inappropriate behavior in the classroom session.

This book also lends itself well to story retell as it is a complete episode.  However, the book’s audience is younger children who are just beginning their school year.  In addition, some of the children I work with have not been exposed to the StoryBraidy and are not developmentally ready for the later stages of story retell. Time will need to be spent at the beginning stages.

Step 1:
Review or introduce the concept of Character.  
The manual for the Storybraid comes with excellent lessons on how to teach the concept of character.  While I do adjust the lessons to meet the needs of my students and teachers, I do follow the order and structure.

For my non-verbal/newly verbal students, I will address basic concepts of pointing to body parts (i.e. eyes, face and head.) I do hand over hand with them if necessary, but I work towards having them point or touch eyes and head on both the Braidy Doll and on themselves independently.    I also work on naming body parts.

Students using short phrases and following 1 step directions will begin identifying characters.  I begin asking questions such as “Are you a character?”  “Am I a character?”  “Is your friend a character?”  “Is your pet a character?”  We are beginning to answer “who” questions.  We begin discussion the physical traits of a character (has eyes, face, and head) and the fact that a character can “do” things. 

For students that already have exposure to Braidy, we will also talk about setting in terms of place.  We begin to answer “Where” Questions.  “Where are you?” “Is a school a setting?”

Step 2
Read and then talk about the book. 
           
For my non-verbal and newly verbal students I have them begin to point to images in the book.  They point to Howard, to his friends, to the teacher and to his friends.  We begin working on naming items in the book.

For my students using short phrases, we will begin answering “who” questions and answering in complete short sentence. 
            “Who is the Character?”
            “Howard is a character.”

            For my older students, we will also begin to answer “Where” questions?
                        “Where is Howard?”
                        “Howard is at school.”
                        “Howard is in the classroom.”
                        “Howard is in the cafeteria.”
                        “Howard is on the playground.”

Step 3
Review the book and use sentence strips.

For my non-verbal and newly verbal students I will have them point to the picture as I say the words.  I use hand over hand if necessary to help them understand what I want.

My students short MLU’s will work on using contractions and verb conjugation.  I work on having them  point independently while saying the words of the sentence, but I also model it if necessary.

For my older students we look at the words under the picture to address print recognition.

For me, the majority of my language therapy is done in the classroom.  In each classroom, I am likely to have students at every level and need to be able to meet all of their needs at once.  I typically see my students for two 30 minutes sessions and I recruit the classroom staff to help me with the lessons.  I will probably repeat this lesson 4 to 6 times, reducing my support and increasing student independence.     

Monday, August 19, 2013

My Room and Good News!

So my good news for the week is that I got my Donorschoose.org project funded! You can view my project here.  If you want more information on Donorschoose.org, check out my blog post here.

I am working on a post about how I intend to use the items in my project, so stay tuned for that.  In the meantime, I thought I would give you a tour of my speech room.   This is what it looked like when I got to school 3 weeks ago.

 And this is what it looks like today.


I share my room with 2 other SLP's. Fortunately I like them a great deal.  The picture above is my work space.  Here is what it looks like when I walk in the room:
On the other side of the map drawers is my space. 

We use rolling cabinets to section off the space and reduce distractions.  The cabinets also make great surfaces to decorate.  This is my Room Rules. 


On the back side of the map drawers, I have my welcome and good bye routine. 

My white board. Can you see the SGM?

My Desk.


There's Story Braidy.


I made the picture on this cabinet on lessonpix.com.  It reminds the younger students that they need to ask before they get into the cupboards.


It's only a little messy in there.

Did you notice the pockets on the doors? More goodies from lessonpix.com.
This side has all my articulation cards that I've made from lessonpix.com

And this side has all my pictures for picture exchange.
I am pretty lucky. My room also has a sink and a bathroom, and we control the heating and cooling.  On the other hand it's a huge campus, and we are pretty far away from the main school, so we have to hike to get kids, work in classrooms or even get to the workroom.  But hey, I'm going to get my work out, right?


Thursday, August 15, 2013

Welcome Routine and Student Folders

So Tuesday was the first day of school for my school district, and it was fun to wandering into classrooms and seeing all my old students.  I won't start official therapy until next week; the first week of school is usually about finding where all my kids are and getting my caseload together.  I will have 4 special education preschool classes, several preschool speech therapy only kids, and I will probably have a few k-5 as well.

I am also setting up my materials for my speech room routine. I like routines.  It makes my life easier.  It also makes my students' life easier, because they know what to expect and what they are supposed to do, which makes them more independent.

This is my welcome routine, which I made using lessonpix.com:


I use this with all of my students who come to my room.  I review it several times after introducing it my students can either do this independently. Occasionally I have to refer them to the list to get them back on track.

This week I got every thing ready to put student folders together for the new year.

Shipping labels, pocket folders, and a reward chart are the main items.  You can download my reward chart for free teacherspayteachers.com here.

On the first session, my students will pick a color for their folder.  I will then put a shipping label on the folder and either myself or the student will write their name on the label. Afterwards, they get to decorate their folder with stickers.

Inside the folder I keep their data sheets and reward chart.


I keep the folders in a file box I bought from Big Lots many years ago.


I made the dividers with poster board and shipping labels.
Most 4 year old's can recognize the first letter in their name.  After some practice they are able to look for their letter, and then recognize their own folder.  Some of my 3 year olds can also do this, but if they can't, I am able to help them pretty easily without getting out of routine myself. 

It's taken me a few years and adjustments to make this system work for me, and this is the first year I haven't felt the need to tweak it a bit.  It's helped reduce behavior issues, and has helped keep me organized.  Hopefully it will give you some ideas.

Do you have a welcome routine?  What is it?  Leave a comment below.


Wednesday, August 7, 2013

Dos and Donts for the coming school year.

I reported back to the schools today and students start next Tuesday.  The first week will be spent getting a schedule together, but within two weeks I should be involved in my caseload.  As I get ready for the year, I thought I would share with you my Dos and Don'ts of working in the schools.


  • Do plan ahead.  All the preparation you do at the beginning of the school year will pay off during and towards the end.  One of the first things I do when I get my caseload, is figure out when IEP's are due and if I have to do testing. I start tentatively scheduling when I'm going to start testing and writing IEP's. 
  • Don't Procrastinate.  Never ever put off tomorrow what you can get done today.  One of the things I have learned is that despite my careful planning something will always happen that will throw my schedule out the window.  So I do things as early as I can so that I am not rushing around at the last minute with too many things to do. (Of course that happens anyway, but less frequently when I don't procrastinate.) 
  • Do be flexible with your coworkers and students.  You aren't the only one who has an intense amount of pressure on you to meet deadlines and provide quality service. Teachers, other related service professionals, even your administration has an amazing amount of work to do while still trying to be positive for the students.  Your students also feel the pressure, from succeeding in the classroom to dealing with social situations.  Many of our students are already struggling in these areas.  The kid who pushes your buttons probably has low self-esteem about his or her own skills.  
  • Don't overbook yourself.  As a school SLP you have an immense amount of paperwork that must be completed.  Try to schedule time to do that.  Don't schedule your students 1:1.  Push in to your special education classes so that you can see large groups of kids at a time. Use the teachers and teaching assistants to help you.  Write your IEP's so that you have flexibility.  Most children on your caseload do fine when you miss a session and don't show regression.  I like to write my IEP's by hours per semester, so that I have flexibility.  Remind parents and teachers that for every hour you see their child, you will spend another hour in service of the child, from documentation to preparing for the lesson.  
  • Do document everything. Billable or unbillable, document everything. The unfortunate truth is, you can get named in a law suit, even if someone else messes up.  Your documentation will save you.  It will also save you when people just aren't sure what you are up too. As SLP's, we have a lot of autonomy in the schools, but it's not unusual for people to start to wonder what you are up to.  Again, that documentation will make your life much easier.
  • Don't fly by the seat of your pants. There's a term I heard recently: R.A.T.  (Random Acts of Therapy).  This is what you get when you don't have a plan.  Even doing play therapy with the little ones, you have to know what you are working for.  If you don't have a plan of what you want and how you are going to get it, as well as how you will know if it worked, then you get R.A.T. .  
  • Do K.I.S.S (Keep it simple, sweetheart.) While you shouldn't make it up as you go, you don't have to make it complicated or elaborate.  I like to follow a routine, I do very similar things each session, so my students aren't guessing about what comes next.  My lessons follow a similar format and I just build on the last lesson.  This means that I am not having to make up a new lesson each session, or even each week. I have an easier time measuring progress, and I save a lot of time in prep.
  • Don't waste your students time. We like to be fun and entertaining.  And I am not against games at all.  But remember this: That 8 year old only has one year to be 8.  He has a lot of things to learn this year, and every time he's in my room, he's missing out on what the other 8 year olds are learning. I need to make sure his time with me is worth it. 
  • Do have a back up plan. In my practice, I use games as my back up as opposed to my standard operating procedure.  Our jobs require us to be "on" the entire time we are working with kids. We don't give out busy work, we don't have free time, or self selection.  But some days, being "on" is really tough. Some days we just don't feel well, but we aren't sick enough to use a sick day.  A good language rich game is a good back up.  It helps keep me engaged with the kids while still not wasting their time. 
  • Don't be afraid to try something new.  The worst thing you can do as a therapist is become set in your ways. Inflexibility regarding strategy, scheduling, and service delivery will make for a frustrating life for you and your coworkers, and well as limit your quality of service for your students.  Things have changed drastically since I was in Grad school, and I suspect that it will only continue to change.  Keeping up with and being willing to adapt to the changes improves the quality of your service.
  • Do follow the lead of the veterans. When I first started working in the schools, I worked with an SLP who had many more years experience.  I remember watching her, and thinking "Why is she doing that? That's so much extra work."  Turned out there was a method for her madness and that little bit of extra work each day saved her hours at the end of the school year.  
  • Don't under estimate your skills. If you are a new SLP, don't worry, you know more than you realize.  I've been an SLP for 16 years, and last school year I had the pleasure to work with an SLP who'd only been out of school for 2 years. I learned so much from her.  She was fresh with the most up to date information.  And she directed me to new places in terms of organization and my knowledge base.  So new or old, you've got a lot to offer. 
  • Do learn from other professionals.  And by other professionals, I mean the OT's, PT's, counselors, social workers, PE teachers, Reading Coaches, etc. that you work with.  In the schools, you are going to run into a lot of people with a lot of different skills: behavior management, crisis prevention, classroom management.  We didn't learn that in school, but these are people who can share what they know, and that knowledge will really help you out.

What are your Dos and Don'ts?  Leave a comment. 

Wednesday, July 31, 2013

Characters

I've recently been participating in the school SLP group on facebook.  It's been really fun. It's pretty active and a good way to find and share information.  If you are a school SLP you should join the School Based Speech and Language group on facebook.

In January of this last school year, my school district brought in Dr. Judy Montgomery, to talk with all the SLP's in our school district about using The Story Grammar Marker (SGM), Braidy the Story Braid, and Thememaker to meet the common core.  Our school district invested some money and made sure that each school had at least one kit.  My school got both the Story Grammar Marker, and Braidy the Story Braid.


Since I work primarily with preschool I've taken over our Braidy puppet, which teaches the same concepts as the Story Grammar Marker, but is cuter.  An SLP from the afore mentioned facebook group asked me what books I recommend for using with the Braidy/Story Grammar Marker.

The first thing you need to address when working with SGM or Braidy is the character.  In general, this is the easiest component to find in books.  I like books with lots of characters to practice the concept.   If you have  an answering "wh" questions IEP goal, think of character as a way to practice "who."

Here are some books for the preschool population that  really help with the concept of character:


Brown Bear, Brown Bear and Polar Bear, Polar Bear by Bill Martin Jr. and Eric Carle are excellent starts to learning about characters.  The books are predictable and helps children work with both expressive and receptive vocabulary as well as works to increase MLU from the pesky 1 or 2 to whopping 4 ("I see a ___.")   I typically use Polar Bear, Polar Bear, because many preschool teachers will already be doing a unit on Brown Bear, Brown Bear.


Good Night, Gorilla by Peggy Rathmann, is an excellent book to work on the concepts of character. The story follows the zoo keeper as he says "good night" to each of the animals in the zoo. Little does he know that the Gorilla is following him, letting everyone out of their cages to follow the Zoo Keeper to bed.  The story is simple, and I work on short phrases with this book: "Good night ______".
I also work on answering both "who" and "where" questions?  "Who is in the bed?" " Where is the armadillo?"    

 Lazy Daisy, Cranky Frankie, by Mary Ellen Jordan and Andrew Weldon is a wonderful book where none of the animals do what is expected.  There are four main characters in the book, a cow, a chicken, a pig, and a dog.  One of the defining characteristics of a character is the ability to do. I use this book to talk about what the characters are doing, even though the characters in this book don't do what they should.  It's a very predictable book, and I work on auditory memory and problem solving by asking the children what the characters should be doing.  As a bonus, the second to the last page has pictures of several animals doing unexpected activities. I like to ask the children what they see that is silly, which helps me address absurdities. I can use a simple sentence structure to work on mlu " ____ don't _____."  For example "Cows don't eat Jelly."


My Friend Rabbit by Eric Rohmann is great story about the trouble Rabbit can get into while trying to solve a problem. There are few words but great pictures and lot's of characters .  I  work on simple prepositions with this book as well.  The plane is "in" the tree.  The squirrel is "on top of" the alligator, etc. We also get to practice inferencing, "What do you think is going to happen?" "How do they feel?"


When talking about Characters, you often need to talk about personality traits.  Is the character nice, mean, funny, silly?  Ten Things I Love About You, by Daniel Kirk is a great book in which the Rabbit tells Piglet all about the great things that he likes about the pig. This is a great story, that leads into talking about personality traits.  With this story, I also  work on some social skills, and will have the student formulate their own sentence about something they like about a classmate.


 I really love The Napping House, by Audrey Wood. This is a great story with lot's of characters.   But I usually introduce this book after I've been working on the Character concept for a while, because it's a great segue into working on Settings.  The setting stays the same throughout the book, but it's repeated over and over.  "...on the bed, in the Napping House, where everyone is sleeping." Along with characters, and introducing the concept of setting, my students will practice answering "wh" questions "who," "what," and "where."  "Who is in the bed?"  "Where is the ____?" "What is he or she doing?" I also target prepositions of "in" and "on."

The truth is, you can pick up just about any book for toddlers and preschoolers and work on characters.

 I want to mention I usually do 4 to 5 hours per book for my preschoolers.  They love repetition rely on the predictability.  I find I have an easier time teaching the concepts once they are familiar with the book.   When I've worked with older children, I find that I can do about 4 or 5 readings before they become bored, but I still find that familiarity of the story increases their independence in retelling the story.  

For more information on the Braidy the Story Braid or the Story Grammar Marker check out http://www.mindwingconcepts.com/.  You can also take a peek at Super Duper's Webber Story Builder, which is similar. 


Wednesday, July 24, 2013

Articulation Homework


Credit line (HTML Code):


 I like homework, especially for articulation. I know some people don't like to send homework.  The truth is, it's not returned consistently and I'll admit that sometimes it's frustrating at the end of a 30 minute session making sure that each of my students has his or her homework.  But in the end, I feel like I need to maximize my sessions with my kids, and one way that I can do that is offer the opportunity for my students to practice at home. The truth is, my students who do their homework make faster progress.  And since my job is to help students not need me, then it only makes sense to send homework.  I find that many students may not return their homework, but they are practicing at home.  Parents will stop in the halls and say that they didn't manage to return the homework, but they are still practicing.

Typically I like my articulation homework to be 3 to 5 words or phrases that were practiced successfully in the speech room.  I want them to practice 5 minutes a day, every day.  A few years ago, I made up a form that provided directions in both Spanish and English with lines for each day of the week, for the parent to sign indicating that they had practiced with their child.  I had a large blank space in the form in which I would write the targeted words.  This was a quick and easy way for me to individualize each students homework based on their goals.  You can download a free copy of that form on my teacherspayteachers page.  Towards the end of last year, I realized that I could make it even easier on me.  In reality, I usually send the same words for each phonological process, because I have the best success with those words.

I read in someone's blog that they set their homework up by copying multiple pages from the Webber Jumbo Articulation Drill Book, and then passed out a copy for homework.  I considered that idea for a while. I do love that giant book.  It definitely has it's uses. It's an awesome tool for single sound disorders.  But I have two reasons why I didn't go that route: 1) I want more explicit directions.  I found that parents really didn't understand what they were suppose to do with the pages. And if they did practice, they might only practice once that week.  2) I don't like all the words.  The pictures are great, but many of the words were too hard or had sounds in other places in the words that made the target more difficult.  The words "cat" and "coat" have a /k/ sound in them, but they are horrible words to work on velar fronting.

So I took my blank homework sheet, and created a homework page for each of the phonological processes I typically work with in my speech room: syllabic reduction, initial consonant deletion, final consonant deletion, velar fronting, cluster reduction and stopping.  

I based my targets on Barbara Hodson's Cycles.  If you are unfamiliar with Cycles or need a refresher course I recommend  checking out playingwithwords365.com's series of posts about it.  It is an excellent tutorial with lots of great resources.

You can buy my homework packet on teacherspayteachers.com here.  Or you can enter my raffle.  Bear with me, as this is my first time using rafflecopter.  But I will give out a copy to a winner on August 1. (I'd like to give out 3 copies, but I'm not sure how that works yet, so I'm only promising one.)

a Rafflecopter giveaway


Thursday, July 18, 2013

Do you use Donorschoose.org?

I can't speak for every SLP,  but in my school district I often feel that SLP's are the red-headed step child in the family when it comes to funding.  We are often last in line when it comes to getting the new technology, and we have to beg, borrow, and steal to get new materials. Of course I spend my own money, but there are times, when what I think would be useful, is just too cost prohibitive to use my own money.

That's where Donorschoose.org  comes in.  When I really want something for my students, but can't afford it out of my own pocket, I write a proposal and request it from Donorschoose.  Think of your proposal as a mini grant. The process is pretty easy and Donorschoose will walk you through it. 

First you need an account.  They will ask you questions about where you work and the population you work with. This is important, because potential donors might just be looking for an SLP who works with your population.

Once you verify that information, you can start posting projects. Projects cost credits based on the over all cost of the project.  You start with 3 credits.  Once you post your project, you share your project via email, twitter, facebook, in person and on the phone.  I find mostly my friends and friends of friends donate.  However, as you get closer to meeting your goal or your deadline, your project becomes more easily found by other donors.  It's really powerful when Donorschoose matches you with an organization that will match funds, and just a small donation will make a large difference.  It's appealing to my friends and family, because it's a legitimate charity, and they know where the money is going.

Once you get your project funded, you start earning your credits for new projects. First you have to write a thank you letter and post it online.  Donorschoose makes it really easy for you, by giving you a template that already lists the names of all your donors.  You also have to confirm that you still want the items requested.   Donorschoose is pretty fast once you've confirmed that you still want the items, and put in the order within a couple of days. So the bulk of your wait time is waiting for the vendor to send it.  Typically, I've receive my requested items within 3 weeks, but have received items within a week before.

Now for the fun stuff.  You get to use your items!  To fulfill your obligation to Donorschoose.org, you need to need to take pictures of your students using the items and post them on the website, and you need to have your students write thank you letters to the donor who completed your project or donated a large amount of money. Donorschoose provides permission slips for photographing your students.  Even with the permission slips, I still take pictures in a way to maintain their privacy.  Profiles, hands, back of their heads, all show donors how their donations are being used while still protecting my students privacy.  As for the letters, my kids are allowed to put their first name on the letter, but not their last.  Donorschoose also checks to make sure there is no identifying information on the notes before they send them off to the donors. I've gotten great feedback from donors who have received thank you notes from my students.

 A friend of  friend closed out my last project and got thank you letters from my students.  She was so pleased that she took a picture and posted it on facebook.

 
Photo by Debi Geroux 

Finally you have to write one more letter on the website.  This is the impact letter.  Talk about how you have used your items and what a difference it has made for you.  Again, Donorschoose has a template set up for you. For each project you have the potential to earn 3 more credits which can be used for more projects in the future.

From Donorschoose, I have received headphones, bean bags, a language master, books, and an ipad. I don't have any active projects now but you can check out my Donorschoose page here.

Donorschoose.org has been a great format to provide my students with the materials that they need.  It's easy to use, and with a little social media savvy, it's easy to get funding.   If you haven't started a project yet, what are you waiting for? 

To give you hand, for the next week, if you link your project to the comments section of this post, I will tweet and pin it. 

Tuesday, July 9, 2013

I ain't gonna paint no more....

So I was going to post this last December.  But immediately after the Sandy Hook tragedy, I faced  a personal tragedy myself.  I didn't know it at the time, but two days before the shooting a friend of mine had killed himself.
My Christmas Holiday was spent dealing with the grief of losing a dear friend.  And the spring semester got so busy that I didn't get back to blogging.  But since I'm back, and I thought I would finish this post.  Following is a post I had meant for before the Christmas Holiday:

I change out my books every few weeks or so. I held on to my last unit for longer than I wanted, but between parent teacher conferences, and the Thanksgiving Holiday it just didn't seem like a good time to switch. But things should calm down until our winter Holiday. So for the next 3 or so weeks, I will use a different book.

I Ain't Gonna Paint No More is an adorable little story about a little boy, who has been banned from painting anymore. But that doesn't stop him, and he begins to paint his entire body.


My target vocabulary book is as follows:  Head, neck, arm, hand, chest, back, legs, feet, and paint. Many of my kids will already know most if not all of there body parts (although I have few who don't.) We will talk about what with our body parts, and I will be looking for them to be able to tell me from session to session what they can do with their body parts.

Next we will do our song.  Instead of body parts, we will work on colors, to keep the theme of painting.  I found this song just doing a google search for preschool songs about colors:

Rainbow Song 
Sung to the Tune of "Hush Little Baby"
Author Unknown
Rainbow purple
Rainbow blue
Rainbow green
And yellow too
Rainbow orange
Rainbow red
Rainbow shining over head.

For finger play I will use the ASL signs for rainbow and for the colors. Because I have many kids who's first language is Spanish I will also sing a loosely translated version in Spanish.

If you have a subscription to lessonpix.com  you can access my cue cards for the Rainbow Song.
I was unable to make public my pictures for the body parts, because I uploaded an internet picture for chest.  But they are easy to make yourself on lessonpix.